The Legend of Mala Tokmachka Radar and Power Systems Guide
Keep advanced weapons online and see threats before they expose your weak blocks.
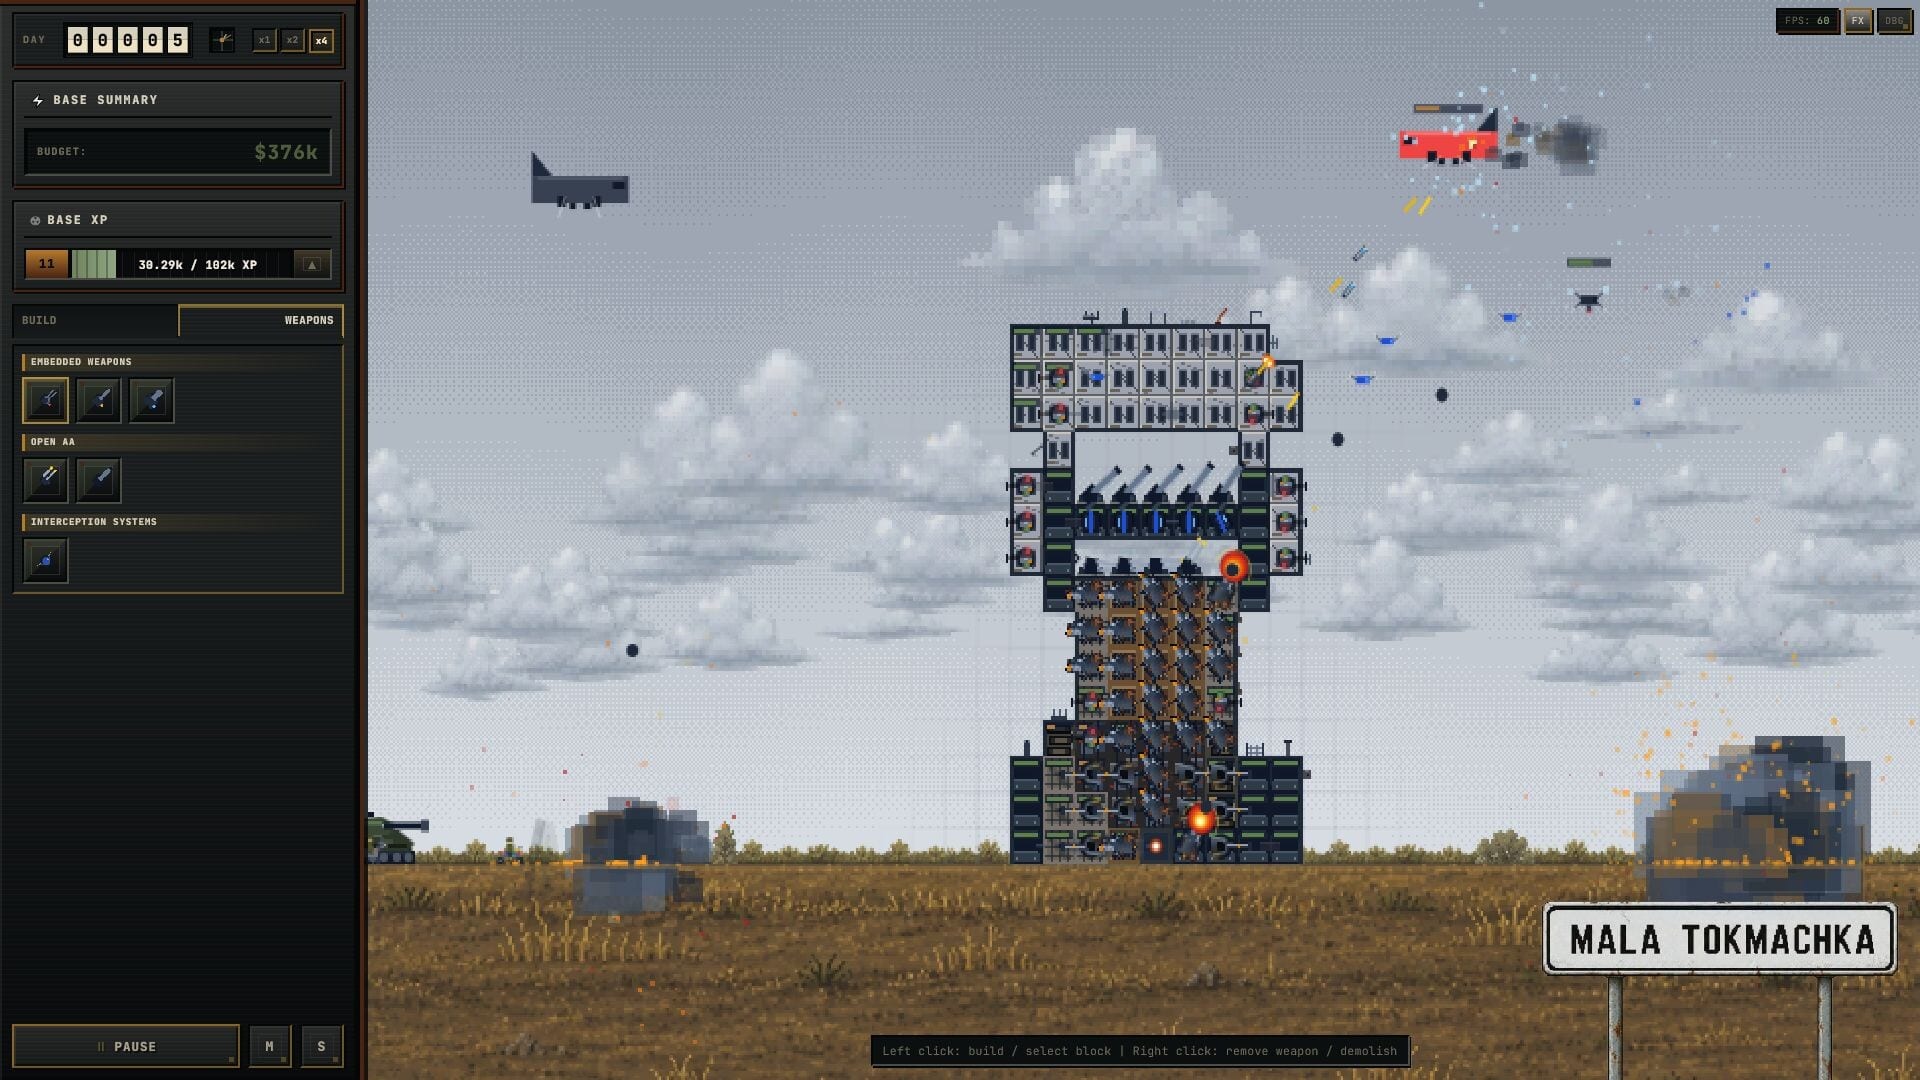
Steam marketing for The Legend of Mala Tokmachka lists radar equipment, power systems, and support modules alongside walls and weapons. Preview footage shows a fortress that is not only guns — it is an industrial stack where detection and electricity decide whether your expensive pieces fire at all. This guide explains how to plan radar and power before launch, how they interact with weapons covered in the Module Reference, and where to place support blocks so a single lucky artillery shell does not brick your entire grid.
Exact wattage numbers and radar ranges are not datamined pre-launch. Treat tables here as role-based preview logic verified against store copy and press descriptions; update after players confirm in-game tooltips.
Why power and radar are not optional luxuries
Classic tower defense often gives free energy. Mala Tokmachka emphasizes trade-offs between immediate guns and infrastructure:
- Lasers and missile platforms — named explicitly as advanced tools in Steam feature bullets.
- Overlapping fire zones — useless if upper-tier turrets brown out mid-wave.
- Vertical expansion — power lines must climb with new floors or you create dead levels.
If you skip support modules early, you may clear ground waves until aircraft or artillery force you to install power-hungry counters — exactly when you have no budget left. Read Repair and Resources for pacing between waves.
Power systems — preview roles
| Module type | Expected role | Build note |
|---|---|---|
| Baseline generator | Keeps core guns online | Place deep inside armor |
| Distribution / relay | Feeds upper floors | Route before adding height |
| Battery / buffer (if present) | Survives brief outages | Pair with repair blocks |
| High-load supply | Lasers, missiles | Budget before weapon purchase |
Placement principles
- Protect the spine — Treat your main power column like a reactor room. Enemies targeting weak outer walls should not chain into generators.
- Build upward with intent — Each new tier in Fortress Building should include power stubs, not retrofits under fire.
- Match load to wave plan — If the next wave adds drones, anti-air may spike demand; delay cosmetic expansion.
- Sacrifice policy — When overwhelmed, shedding upper luxury weapons beats losing core grid — triage rules in Repair and Resources.
Radar and detection
Press coverage (EGW.News, dev.ua) highlights radar installations as part of the construction toolkit. Expected functions pre-launch:
- Early aircraft cue — Gives anti-air time to track before bombs release.
- Artillery spotting — May reduce blind zones for long-range threats.
- Target sharing — Possible synergy with missile platforms (confirm post-launch).
Radar without weapons is wasted money; weapons without radar may overkill near targets while missing approach vectors. Pair with Anti-Air Defense and Ground Defense.
Radar placement sketch
        [Radar mast — top or forward]
              |
    [AA] — [AA] — [Missile]
              |
         [Power core]
              |
           [Walls]
Forward radar exposes the dish; top radar gains range but becomes sniper bait. Most preview builds use one mast per facing, not a single omni dish hidden inside.
Support modules beyond power
Store copy bundles repair blocks, defensive platforms, and unspecified support modules. Likely categories:
- Repair accelerators — Faster patch between waves.
- Buff relays — Rate-of-fire or range auras (confirm after launch).
- Structural braces — Reduce collapse when lower walls fail.
Cross-reference Modules tier list when rankings land.
Power + radar vs weapon priority
Use this preview order on your first three runs:
- Minimal walls + one ground gun + one AA — Getting Started.
- Core generator + one radar facing main air lane.
- Second ground lane or first missile/laser only after grid stable.
- Vertical expansion with duplicated power spine.
Skipping step 2 is the most common preview mistake seen in trailer analysis: players stack cannons until a drone wave arrives and advanced turrets never activate.
Failure modes to expect
| Symptom | Likely cause | Fix |
|---|---|---|
| Guns silent mid-wave | Power segment destroyed | Armor spine, redundant gen |
| Aircraft slip through | Radar blind spot | Mast relocation, second facing |
| Cannot afford repairs | Over-invested in luxury weapons | Downgrade top floor, fix grid |
| Upper floor dead | No vertical relay | Rebuild with power stubs |
Links to other systems
- Enemies and Threats — which waves spike power draw.
- Best Builds — templates with support cores.
- Walkthrough: First Days — when to buy first radar.
- Module Reference — quick lookup table.
Post-launch update plan
After August 13, 2026 we will add confirmed numeric ranges, exact module names, and screenshots of power UI. Until then, bookmark this page and verify tooltips on day one via Launch Day Checklist.
Frequently Asked Questions
Quick answers to the most common questions.
Are power costs public yet?
Not in datamined form pre-launch. This guide uses Steam-described roles until players publish numbers.
Can I ignore radar if I have many AA guns?
Preview logic says no — overlapping AA still needs detection time against fast drones and aircraft.
Do lasers need the most power?
Likely yes per genre conventions and Steam feature list — confirm after launch.
Where to place generators?
Deep inside the fortress spine, below primary weapons, with armor segregation.
Related tier list?
See Modules tier list and Module Reference.